Adacado ~ Retargeting Uninterrupted Post Google Elimination of the Third-Party Cookie

PRODUCTS: WEB-SCRAPER

WEB-SCRAPER

The Adacado web-scraper is a tool used to generate product data for your campaign when you are unable to use a data feed. To use the web-scraper, you will need to first determine whether your website is compatible. After testing, you will need to add a code snippet called a pixel to the product pages of your website.

Ready to get started? Please continue reading to learn how to add product data using the Adacado web-scraper and pixel!

Contents

Testing Website Compatibility

Mapping Product Data Fields

Checking Product Data

FAQs

Testing Website Compatibility

Product data imported with the web-scraper will be available for all campaigns under the respective advertiser, this is what we call advertiser level data. Your campaign product settings should be set to “Create products for advertiser”.

Choose to get data using the pixel.

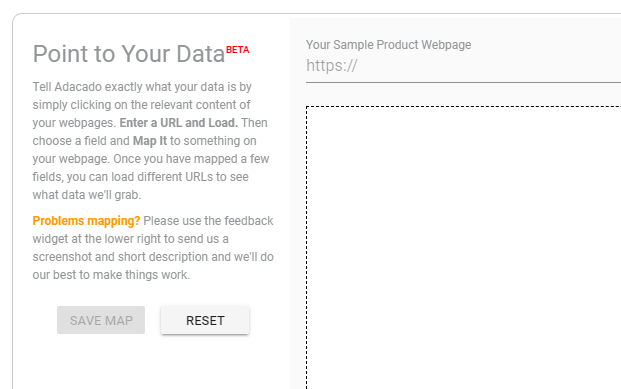
When you make this selection, the following will appear on the page. Here, you will enter a URL of a product page from your website. Click the “load” button.

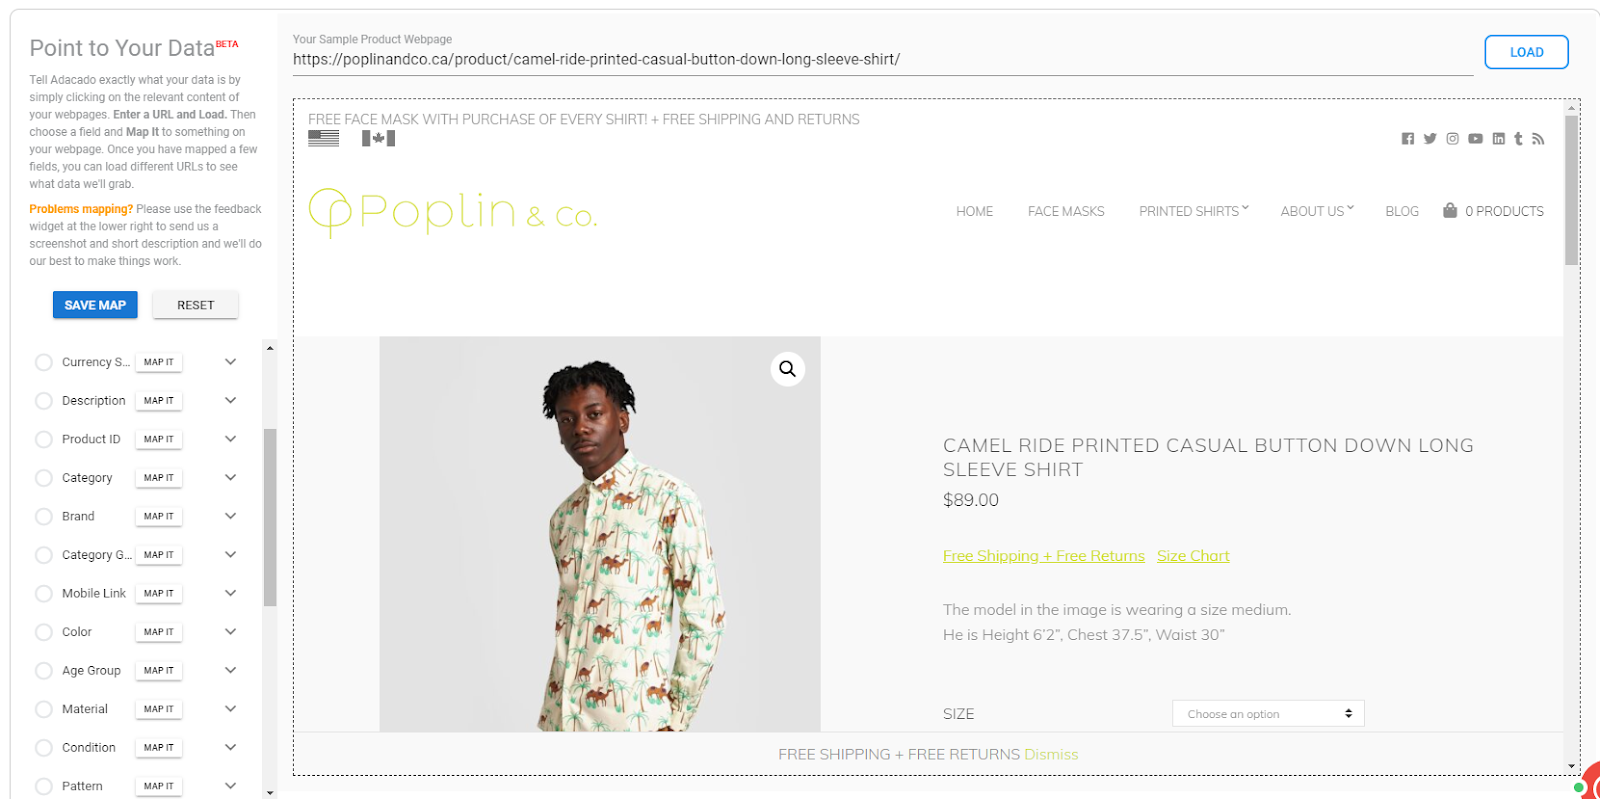
If your website is compatible, below the URL input field you will see a preview of the page from the URL.

If the page does not display properly, your website may not be compatible with the Adacado platform. In this case, please contact us using our web chat or email at support@adacado.com

Mapping Product Data Fields

If your website is loading properly in the web-scraper preview, the next step is to provide our system with some instructions about where to find relevant product information on your product pages. Mapping Adacado’s data fields to the location of product information on a page is how Adacado is able to consistently grab the right information. 

The information mapped to the data fields can be used in your ad creative as well as for some of the targeting objectives which are set on the campaign settings page.

You only need to map one product URL using the web-scraper. This process tells the system where to find particular product information (title, price, image, etc) on any of your product pages. For this to work your product pages will need to have a consistent structure.

Recommended Data Fields

As a general rule, you should try to map the following data fields at the minimum as they are almost always used.

  • Product Title
  • Product Image
  • Price
  • Product ID (SKU, VIN, etc)

Auto Mapping Data Fields

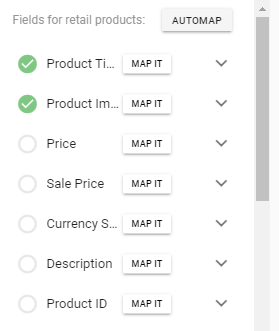
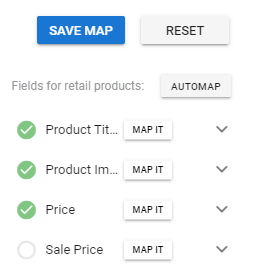
To the left of the website preview you will see a list of data fields. Our web-scraper will automatically try and map these for you, so you will likely see a mix of fields which have been auto mapped as well as ones that haven’t. A mapped data field will have a green check-mark next to its title. You can click the “Automap” button to attempt to automatically map additional fields, or simply map them yourself as described below.

Manually Map Data Fields

To map additional data fields click the “Map It” button next to the field you wish to map.

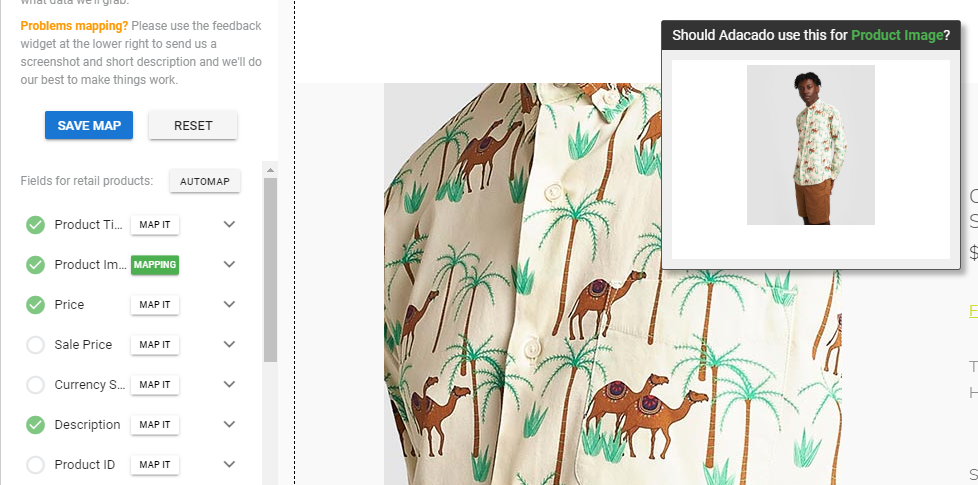
You can then move your mouse to the product page preview and hover over the information matching the data field type you have selected. A rectangular box will appear over data which can be mapped, illustrating what will be associated with the product data. Click the mouse to create a link between the data field and the product detail on the page.

Check Mapping is Correct

For any of the mapped data fields, you can double check that the information is correct. To do so, simply click the downward arrow for any data field and the value currently mapped will be displayed. 

The “Clear” button will unmap the data field.

Finished Mapping?

Once you are satisfied with the mapped fields, press the “Save Map” button. The next step will be to automatically add product data when visitors browse the website.

Gathering Product Data With the Adacado Pixel

Once you have set up the product structure for product pages by mapping a URL on the product settings page, it is time to set up the Adacado pixel.

When a visitor to your website browses a product page, the pixel will send information to the Adacado system, which will be used to create product data, based on the structure you set up during the mapping process. This allows us to serve your ads using the product data created by the pixel. You may use the pixel for both retargeting and product data gathering.

Below the web-scraper mapping preview, you will find a section which includes the pixel for your advertiser. This is the same pixel code which is found on the publish page of any campaigns created for this advertiser.

Please send a copy of your pixel, along with these pixel implementation instructions, to your webmaster or whomever manages your website code. It is very important that the pixel is placed on product pages only. If the pixel is placed on any other pages such as the homepage category list pages then the pixel will import erroneous data into the system and your ads.

Make sure to test that the pixel is working as expected after implementation has been completed.

Requirements for Data Gathering with the Pixel

  • Properly implemented pixel on all product, vehicle, or service pages
  • Product settings has been set to advertiser level using pixel
  • Product page structure has been mapped using the web-scraper tool

Checking Product Data

When you have mapped the product page structure and successfully implemented the pixel, product data will be added to the system incrementally. As users browse the website, the pixel will trigger each product to be added to the Adacado system. Products in the system will then be available to be shown in your ads.

FAQs

The Adacado pixel is a little snippet of JavaScript code placed on your website. When someone visits a page on your website containing the pixel, information about the page they visited is sent back to Adacado. We use this information to create product inventory to be used in your ads as well as to achieve various campaign objectives called retargeting. Find out more about the pixel here.

Once you have implemented the pixel, it is best to check that it is working properly, follow our guide on checking the pixel status here.

The pixel code should be placed just before the </body> tag on all product pages where you want to generate ads and/or track user behavior. Check out our guide on implementing the pixel for detailed instructions.

Unfortunately, not all websites are compatible with the Adacado web-scraper. If no preview appears, or you see something unusual, your website is likely incompatible with the web-scraper. Our recommended method for creating product data is to use a data feed.

If you’re still having trouble or have questions, feel free to reach out to us anytime at support@adacado.com